Windows 11 Auto HDR: Better Graphics on Old Games for Free
Gaming, Windows 11, HDR
Windows 11 Auto HDR: Instantly Level Up Your PC Games
If you love PC gaming and you’ve got a halfway modern setup, Windows 11’s Auto HDR is one of those features that can make your favourite titles feel surprisingly fresh again. With just a couple of clicks, games you’ve played for years can suddenly explode with brighter highlights, deeper shadows, and far more vivid colours—without you touching a single in‑game graphics slider.
What Auto HDR Actually Does to Your Games
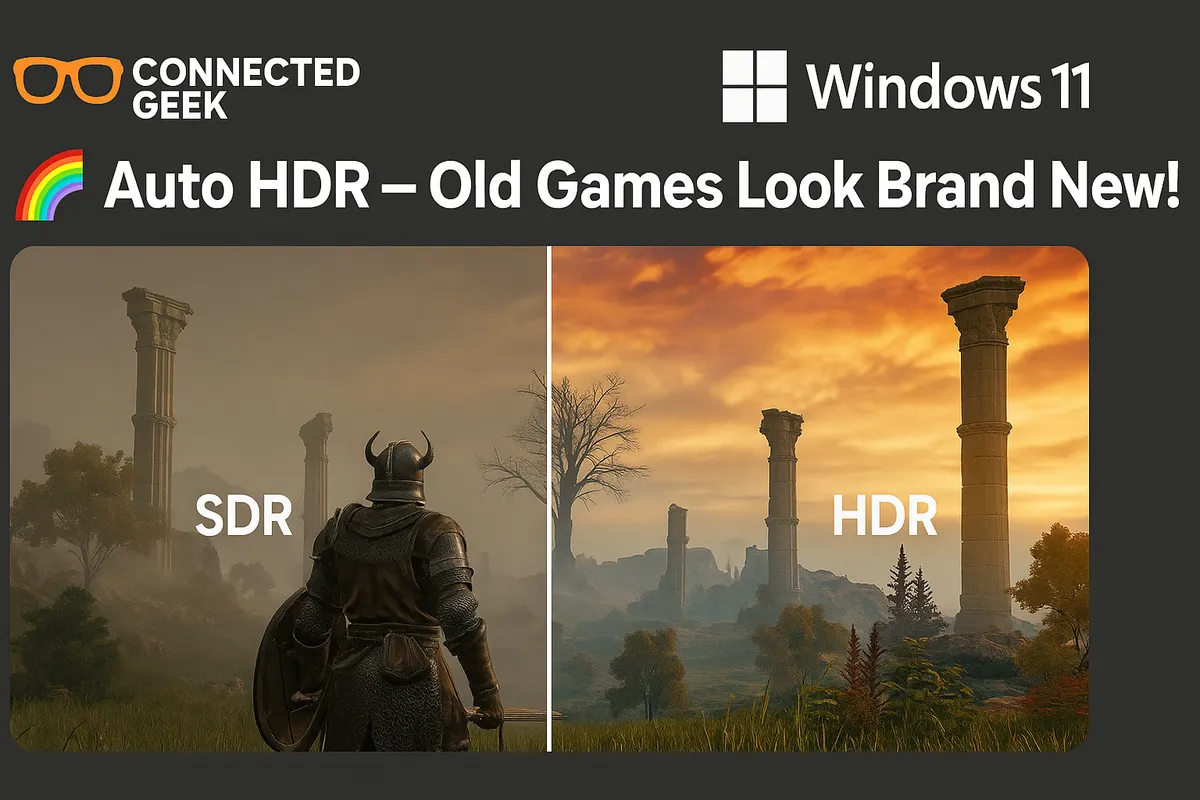
At its core, Auto HDR in Windows 11 is like giving older games a next‑gen visual upgrade for free. Traditionally, only games built with native HDR support could tap into the expanded brightness and colour range of modern displays. That meant you needed a title specifically coded for HDR to see those eye‑searing sunsets and inky, detailed shadows. Auto HDR changes the rules entirely.
Windows 11 uses intelligent processing—yes, including AI‑driven analysis—to take games built on DirectX 11 and DirectX 12 and map their standard dynamic range visuals into a high dynamic range signal. The result is that bright elements like explosions, spell effects, neon signs, and sunlight get noticeably brighter and more impactful, while dark areas gain depth instead of turning into flat black blobs. Colours pop harder, with richer reds, lush greens, and cooler blues, all without blowing out the image or losing detail.
It’s almost like running a remaster on the fly. You keep the game’s original art direction, but Auto HDR stretches the lighting and colour into a wider range your HDR display can actually show. In many titles, especially those with strong contrast and atmospheric lighting, the difference can be dramatic enough to make you stop mid‑match just to admire the view.
How to Enable Auto HDR in Windows 11 (It’s Seriously Easy)
The best part? Turning on Auto HDR is incredibly simple. You don’t need to dig through obscure menus or tweak config files. Here’s how to flip the switch:
- Open Settings in Windows 11.
- Go to System, then select Display.
- Click on HDR (you’ll see this if Windows detects a compatible HDR monitor).
- Scroll down to the Auto HDR section and toggle it On.
You can also reach this through Settings → Gaming → Game Mode → Graphics on some builds, but the key path to remember is that Auto HDR lives under your Windows HDR display settings. Once enabled, Windows will automatically apply Auto HDR to supported DirectX 11 and DirectX 12 games that are running in fullscreen or borderless windowed mode, with no extra work required from you.
You’ll Need the Right HDR Monitor to See the Magic
Before you expect Auto HDR to blow your mind, you do need a proper HDR‑capable display. A standard SDR monitor simply cannot show the expanded brightness and colour range, no matter what settings you toggle. Windows 11 will even tell you if your screen isn’t up to the task by hiding or greying out HDR options.
Look for a monitor or TV that advertises HDR support—terms like HDR10, DisplayHDR, or console‑ready HDR gaming displays are a great sign. Ideally, your screen should support higher peak brightness and a wide colour gamut, so those intense highlights and saturated colours really stand out. Connect it via a modern HDMI or DisplayPort cable, and make sure you’ve selected the correct refresh rate and colour depth in your display settings.
Once your HDR monitor is connected, head to Settings → System → Display → HDR and enable HDR for that display. With HDR enabled at the system level and Auto HDR toggled on, your games can finally stretch their legs and take advantage of the hardware you paid for.
Game Compatibility: Which Titles Benefit from Auto HDR?
Auto HDR is designed specifically for DirectX 11 and DirectX 12 games. That covers a huge chunk of the modern PC library, from competitive shooters to sprawling RPGs. If a game runs on DX11 or DX12 and doesn’t already have its own built‑in HDR mode, Windows 11 can often step in and give it that HDR treatment automatically when you’re running on an HDR display.
Some games with native HDR support can still run alongside Auto HDR, but in most cases you’ll want to use the game’s own HDR option if it has one, because it was tuned specifically by the developers. Auto HDR really shines with titles that never got an HDR patch in the first place. Think older favourites and long‑time staples in your library that suddenly look like they’ve been quietly remastered for modern screens.
Not every single game will behave perfectly—some menus or 2D overlays might look a bit too bright or stylised—but for many players, the trade‑off is absolutely worth it. And because Auto HDR is handled by Windows, you’re not stuck with an all‑or‑nothing approach. You get to fine‑tune it per game, which brings us to the next powerful trick.
How to Turn Off Auto HDR Per Game Using the Xbox Game Bar
Maybe you love Auto HDR in your cinematic single‑player adventures but find it a bit distracting in a super competitive shooter. No problem—Windows 11 lets you control Auto HDR on a per‑game basis using the built‑in Xbox Game Bar, so you’re never locked into one global setting.
- Launch the game you want to tweak and get into gameplay.
- Press Win + G to open the Xbox Game Bar.
- Look for the HDR or Auto HDR widget or settings panel within Game Bar.
- Toggle Auto HDR off for that specific title.
Windows will remember your preference, so next time you fire up that game, it will respect your per‑title choice instead of forcing Auto HDR back on. This lets you curate your own HDR experience: keep it enabled where it looks stunning, and disable it where you prefer the original SDR look or the game’s native HDR mode.
Why Auto HDR Is Worth Turning On Today
Auto HDR in Windows 11 is one of those rare upgrades that gives you a noticeable visual boost with almost no effort. If you already own an HDR monitor and you’re playing DirectX 11 or 12 games, you’re leaving free image quality on the table by ignoring it. Brighter highlights, deeper shadows, and more vivid colours can transform the mood, atmosphere, and readability of your favourite worlds, making them feel more alive and immersive than ever.
Flip on Auto HDR in Settings → Gaming → Auto HDR via the HDR display options, fine‑tune it per game with the Xbox Game Bar, and take your library for a spin. You might be surprised at how many “old” games suddenly look brand new once Windows 11’s intelligent HDR magic gets to work.
