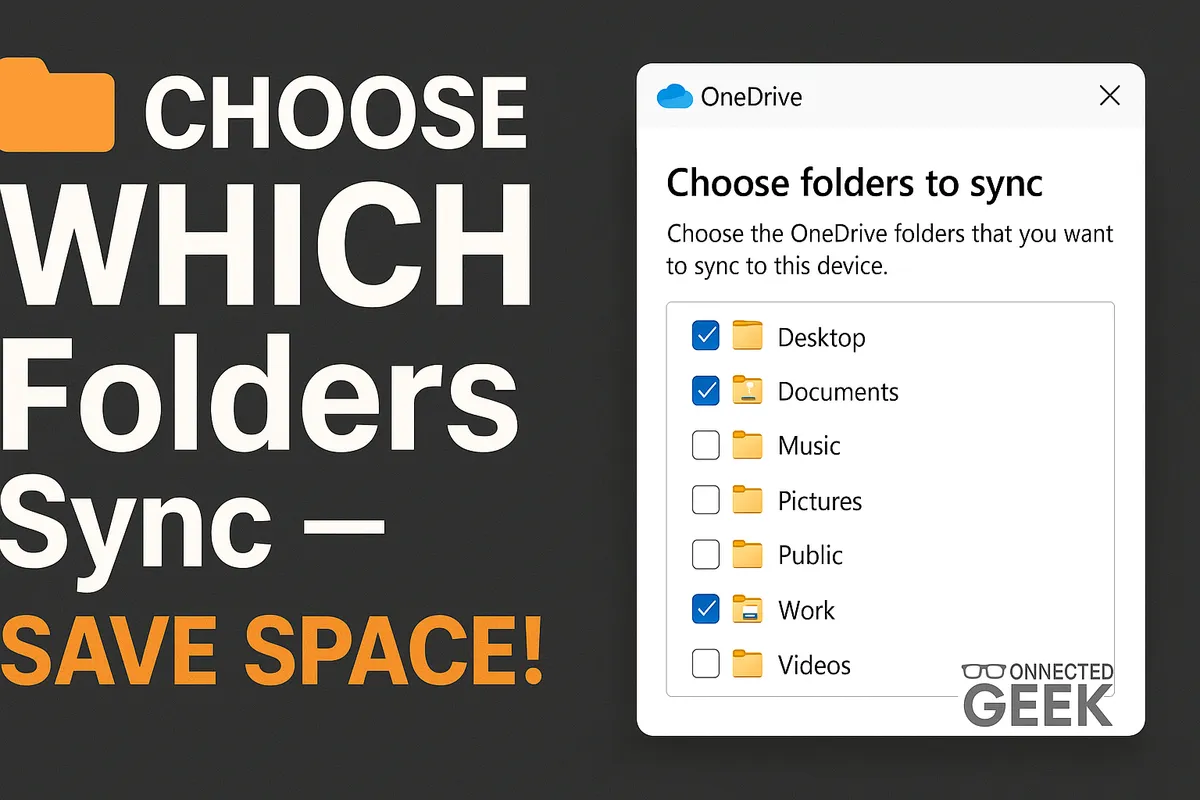
OneDrive Selective Sync: Choose Exactly What Downloads to Your PC
Windows 11, OneDrive, Storage Management
OneDrive Selective Sync in Windows 11: Save Space by Choosing Exactly What Downloads
If your Windows 11 laptop has a 128GB or 256GB SSD, every gigabyte matters. OneDrive Selective Sync lets you decide exactly which cloud folders live on your device, so you keep important files close at hand without filling your drive. In this guide, you’ll learn why Selective Sync is so useful, how to set it up step by step, what actually happens to unticked folders, and how to design a smart setup for a small laptop—plus a tip on combining it with Files On-Demand for maximum flexibility.
Why Selective Sync Matters on Small SSDs
Modern laptops are fast, sleek, and often a bit stingy with storage. A 128GB or 256GB SSD can feel full surprisingly quickly once you add Windows, apps, games, photos, and documents. If you also use OneDrive to store years of files in the cloud, downloading your entire library to a small SSD simply isn’t practical.
That’s where OneDrive Selective Sync comes in. Instead of syncing everything, you can tell OneDrive, “Only keep these specific folders on this device.” Your cloud library stays complete online, but your laptop only stores the pieces you really need day to day. This is especially helpful if:
- You have a large photo or video archive in OneDrive that runs into tens or hundreds of gigabytes.
- You keep old project folders “just in case” but rarely open them on your laptop.
- You use multiple devices and only want certain folders on each one (for example, work files on your work laptop, personal photos on your home PC).
Without Selective Sync, OneDrive tries to mirror your entire cloud storage on your device. That’s great on a big desktop drive, but on a 128GB SSD it can mean annoying “low disk space” warnings, slow performance, and the constant need to uninstall apps or delete local files. With Selective Sync, you keep your SSD lean and your workflow smooth, while your full library remains safe in the cloud.
How OneDrive Selective Sync Works in Windows 11
At a simple level, Selective Sync lets you tick or untick folders in your OneDrive so that only the checked folders download to your PC. The rest stay in the cloud. You can change these choices at any time, and each device can have its own selection. Your work desktop might sync everything, while your travel laptop only syncs essentials.
Importantly, Selective Sync doesn’t delete anything from OneDrive online. It only controls what’s present on this particular device. Think of it as a filter between your cloud library and your local storage: you decide what passes through to your laptop, and what stays in the cloud until you need it elsewhere.
Step-by-Step: Setting Up OneDrive Selective Sync in Windows 11
You can set up OneDrive Selective Sync in just a few clicks. Here’s the exact process in Windows 11, using the built-in OneDrive client.
Step 1: Open OneDrive Settings from the Taskbar
1. Look at the right-hand side of your taskbar (the notification area). You should see the OneDrive cloud icon—usually a white or blue cloud.
2. Click the OneDrive icon once. This opens the OneDrive flyout panel, showing recent activity and quick actions.
3. In the top-right corner of this panel, click the gear icon (Settings). A small menu will appear.
4. From that menu, click Settings. This opens the main OneDrive settings window, where you can control sync behavior, accounts, and more.
Step 2: Go to the Account Tab
In the OneDrive settings window, you’ll see several tabs down the left-hand side or across the top (depending on your version), such as Sync and backup, Network, and Account. Click the Account tab. This section controls which OneDrive account is connected and what content from that account is syncing to your PC.
Step 3: Click “Choose folders”
Within the Account tab, you’ll see information about your OneDrive, such as how much storage you’re using and where your OneDrive folder is located on your PC. There will also be a button labeled Choose folders. Click this button to open the Selective Sync dialog. This is where you decide which OneDrive folders will be available on this device.
Step 4: Untick Folders You Don’t Need Locally
The Choose folders window lists all the top-level folders in your OneDrive, each with a checkbox. You may also see subfolders that you can expand and manage individually. By default, many people have everything checked, which means all folders are eligible to sync to this PC.
- To keep a folder on this device, leave its box ticked.
- To remove a folder from this device (but keep it in the cloud), untick its box.
Take a moment to think realistically about what you actually open on this laptop. If you only browse your photo archive once every few months, that’s a good candidate to untick. If you no longer work on a particular client’s project, you can safely untick their old project folder as well. Remember, you can change these choices later, so you’re not locking yourself into anything permanent.
Step 5: Click OK to Apply Your Choices
When you’re happy with your selection, click OK. OneDrive will start applying the changes. Depending on how many folders you unticked and how large they are, this may take a little time. During this process, OneDrive removes the local copies of those unticked folders and files from your device, freeing up space on your SSD.
You don’t need to restart your PC. Once OneDrive finishes updating, your File Explorer view of OneDrive will match your new choices for this device.
What Happens to Unticked Folders After Selective Sync?
The most common worry people have is, “If I untick a folder, am I deleting it from OneDrive?” The reassuring answer is no. Unticking a folder in Selective Sync only affects this particular PC. Here’s what actually happens behind the scenes:
- The local copy of that folder and its files is removed from your laptop’s SSD. This is what frees up disk space.
- The folder will disappear from File Explorer under the OneDrive section on this device, because it’s no longer being synced here.
- The folder and all its contents remain safely stored in OneDrive online. You can still access them any time by signing in at onedrive.com or from any other device that is syncing that folder.
Think of it like shelving a box in a warehouse instead of keeping it in your small apartment. The box still exists and is labeled; it’s just not taking up space in your living room. When you need it again, you can bring it back.
If you ever want a previously unticked folder to return to your laptop, just repeat the steps above, go back into Choose folders, tick the folder again, and click OK. OneDrive will download it back to your device and it will reappear in File Explorer as if it never left.
A Practical Example: Smart OneDrive Setup for a Small Laptop
To make this more concrete, let’s walk through a realistic example. Imagine you have a Windows 11 laptop with a 256GB SSD. You use OneDrive for both work and personal files, and your cloud storage looks something like this:
- Work – active client projects, reports, presentations, and reference documents.
- Personal – everyday documents, budgets, and personal notes.
- Photos – a large archive of family photos and videos from the last ten years.
- Old Projects – completed work you keep for reference but rarely open.
- Backups – exported copies of phone data or old computer backups.
On a small SSD, syncing everything would quickly eat up space. Instead, you can use Selective Sync to prioritize what truly needs to be local:
Folders to Keep Locally (Tick These)
- Work – You open these files daily. Keeping them fully synced means you can work offline on planes, in cafés, or during spotty Wi‑Fi without any hassle.
- Personal – These documents are often small but important: ID scans, budgets, and forms. Storing them locally doesn’t use much space but gives you instant access.
With these two folders ticked, your everyday workflow is fully supported. You can open, edit, and save files quickly, even without an internet connection.
Folders to Remove from This Device (Untick These)
- Photos – Photo and video libraries can be huge. If your archive is 200GB, syncing it to a 256GB SSD is unrealistic. Untick this folder to keep your photo collection in the cloud only. When you want to browse or download a few pictures, you can do so from onedrive.com or from another device with more space.
- Old Projects – You rarely touch these files, but you don’t want to delete them. Unticking this folder keeps them safely stored online without filling your laptop. If you ever need one of these projects again, you can temporarily re‑enable it in Selective Sync or download specific files from the web.
- Backups – Backup folders are typically large and not meant for everyday browsing. They’re perfect candidates for cloud‑only storage. Untick them so that they don’t consume precious SSD space.
After applying these choices and clicking OK, your File Explorer view under OneDrive will show only the Work and Personal folders on this laptop. Your Photos, Old Projects, and Backups folders will no longer appear in File Explorer here, but they remain intact and accessible online and on any other devices that sync them.
Using Selective Sync Together with Files On-Demand
Selective Sync is powerful on its own, but it becomes even more flexible when you combine it with Files On-Demand, another OneDrive feature in Windows 11. Files On-Demand lets you see all your synced OneDrive files in File Explorer without necessarily storing the full contents of each file on your device until you open it. Files can exist as:
- Online-only – The file appears in File Explorer, but the content is stored in the cloud. It takes almost no local space until you open it.
- Locally available – You’ve opened the file, so a copy is cached on your device. Windows can free this space later if needed.
- Always keep on this device – You’ve told OneDrive to keep a permanent local copy, even if storage is tight.
When you combine Selective Sync with Files On-Demand, you get the best of both worlds:
- Use Selective Sync to decide which folders even appear on this device. This is your first line of defense for saving space—only essential categories of content show up at all.
- Within those selected folders, let Files On-Demand manage how individual files use space. Most files can stay online‑only until you need them, while a handful of critical documents can be marked “Always keep on this device” for offline access.
For example, on your 256GB laptop you could:
- Use Selective Sync to include only Work and Personal folders.
- Within the Work folder, mark your current, active project as “Always keep on this device” so all its files are fully offline and instantly available.
- Let older work files in the same folder remain online‑only. They’ll still appear in File Explorer, but they won’t consume space unless you open them.
Final Thoughts: Take Control of Your OneDrive and Your SSD
Small SSDs don’t have to mean constant storage stress. With OneDrive Selective Sync in Windows 11, you can choose exactly which folders download to your device, keeping your most important work and current documents close by while leaving bulky archives and old backups safely in the cloud. Unticked folders disappear from File Explorer on this PC, but they remain fully available at onedrive.com and on any other devices that sync them.
For a lean, efficient setup on a 128GB or 256GB laptop, keep active work projects and everyday documents local, remove large photo archives and old backups from this device, and then layer Files On-Demand on top. This combination gives you the comfort of a complete cloud library, the speed of local access where it counts, and the peace of mind that your SSD isn’t quietly filling up in the background.
